

How To Move Apps To Sd Card On Zte Maven 2

The ZTE Maven was launched in June 2015 on Android operating system, v5.1 which is the lollipop. It is a light-weight device of about 133.5 gm and a 9.9 mm thickness. One of the best feature of this device is its 8GB internal storage capacity in addition to the 32 GB SD card slot for external storage. It is supported by a 2100 mAh battery which is not so bad for the price it comes at. Talking about the camera, it can be a bit disappointing for some as it only has a 5 megapixel quality although with LED flash and just a basic VGA for the front. The RAM with just 1 GB capacity is also very basic and is not a good buy for the heavy users.
All that said about the ZTE Maven, since for users of today or rather the owners of the ZTE Maven, would be looking for a better alternative in terms of speed and performance, rooting can be a great option for them, after all who does not enjoy freedom from restrictions on his device! Hence in this article, we will tell you about rooting your ZTE Maven which would include how to root ZTE Maven as well as the advantages and disadvantages of rooting it. To root ZTE Maven as said above is a great option in bringing out the best out of it, however it is very important to keep in mind a few important points that we will discuss further.
Let us start by knowing a bit about the pros and cons of rooting the device.
Part 1: The pros and cons of rooting ZTE Maven
Well, rooting has many advantages which is why many people opt for this method specially the younger generation. Before we tell you about the good and bad points or rather warnings on rooting your device, let us understand what is rooting. In the simplest of definition rooting is a method which gives you all the administrative rights in your phone. Rather, you get access to all Android files in your device and play with it. Hence rooting is undeniably the most attractive proposition for users who want to experience the best in their phone.
Let us look at some of the advantages and disadvantages that one must keep in mind before thinking about rooting their ZTE Maven.
Pros:
- Provides you with rights to system modifications.
- Helps you to allow uploading custom ROMs.
- Allows to make complete backup of the entire operating system and applications in your phone.
- You can even install applications on your phone's memory card which otherwise is not possible.
- You are free to uninstall unwanted apps that may be even pre-installed in your device.
- Now you can even make changes to the initial screen of your phone.
- Rooting increases the speed and battery life of your phone.
- Your RAM becomes free so you can experience faster streaming video, wifi increase etc.
- You are the boss, so do anything with your device.
Cons:
- The manufacturer's warranty will be void since you will be installing an unofficial operating system, so you would lose any help if you need to repair your phone.
- Your device may become unstable after rooting.
- Rooting may attract and make your device susceptible to viruses and malware.
So these were the pros and the cons that you should be aware of before opting for rooting your ZTE Maven.
Let us move on to the method of rooting now in the next section.
Part 2: How to root ZTE Maven step by step?
In this section of the article, we will discuss in detail about the one click rooting process for your ZTE Maven. The Dr.Fone Android toolkit from Wondershare offers a simple and hassle free rooting method which is 100% safe and secure as well. This method, which supports over 7000 devices, is a well-known rooting process with the highest success rate in the industry. The Wondershare toolkit also offers you a free trial on their website and guides you through all the steps.
![]()
Dr.Fone toolkit - Android Root
Root Your Android Phone with One Click.
- Simple process, hassle free.
- Supports over 7000 devices.
- Highest success rate in the industry.
- 100% safe and secure.
3981454 people have downloaded it


However, to make things easier for you, we have listed down this two-step process below:
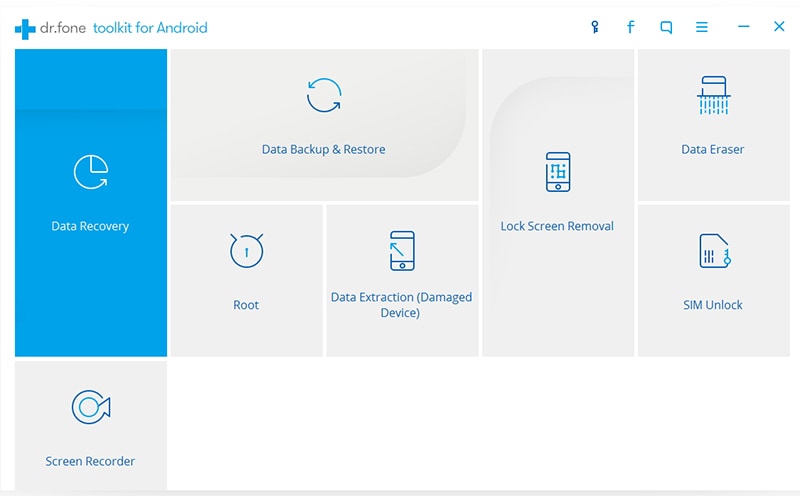
Step No 1: The very step that we would across to root ZTE Maven using Dr.Fone toolkit, would be connecting the phone.
To do this, first launch the Dr.Fone toolkit for Android on your personal computer and then among all toolkit, click on the one that says "Root".
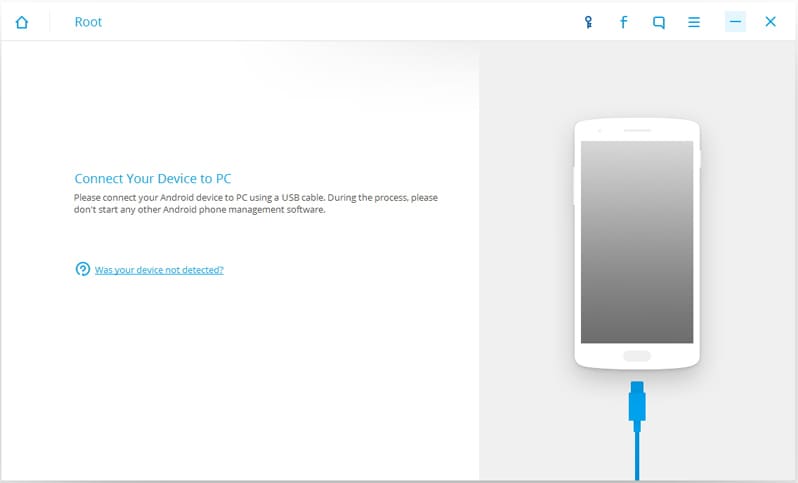
Now, using a USB cable, preferably an original one, connect your ZTE Maven to the computer. If your Android version is 4.2.2 or above, you will see a pop-up message. Simple click on OK to allow USB debugging so that the Dr.Fone toolkit can easily identify and connect your mobile phone.
Step No 2: The last and final step of this method is detecting and rooting your ZTE Maven.
Once you are sure that your Maven has been connected to the PC successfully, click on Start that is visible on the Dr.Fone toolkit. Now the program will start detecting your device and look for the right way of rooting it. The detecting process is lengthier depending on the phone model.
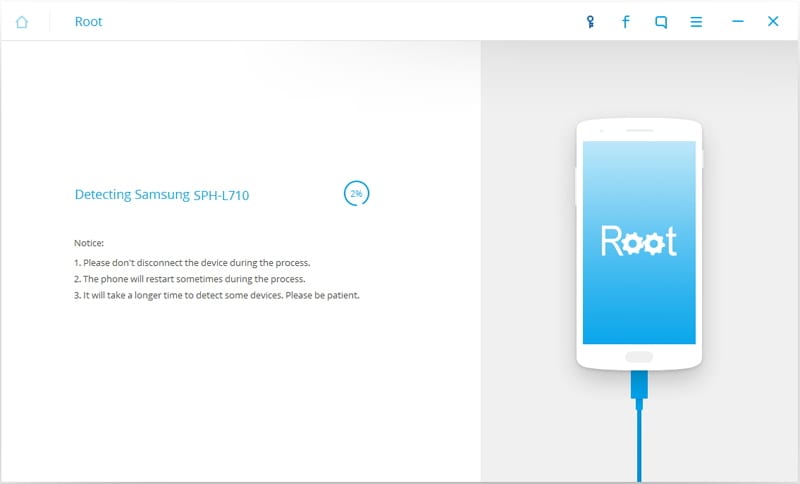
Finally, the Dr.Fone will now be ready to start the rooting process of your ZTE Maven. Just click on "Root Now" to start the process.

Even during the process of rooting, you will see pop-messages asking for permission to root your ZTE Maven. Click to confirm and continue rooting.
There you go, in a few minutes get ready to explore new possibilities with your rooted ZTE Maven by your side.
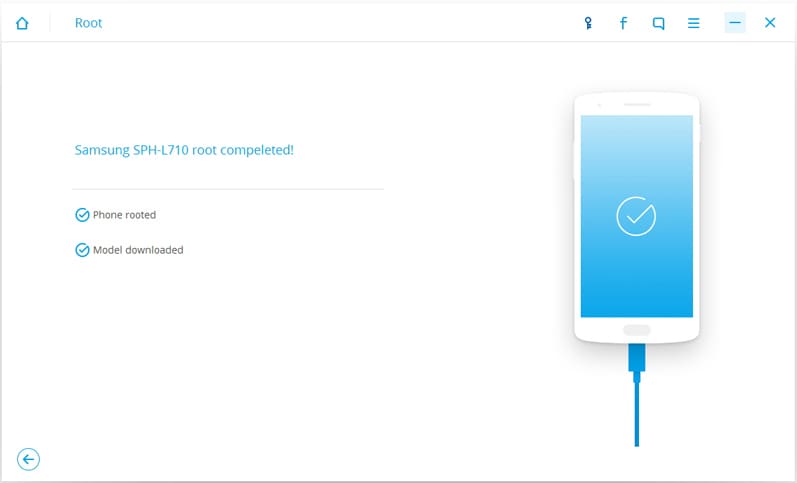
Congratulations!
So, this was the one click step process for a successful and effective rooting of ZTE Maven. However there are a few things that one must keep a check on before starting with the process like:
- Since you never know what may happen during the rooting process, it is always better as a precautionary measure to backup your data.
- Never ignore the battery level. The rooting process should not be interrupted, so ensure a battery level of at least 70-80% on your ZTE Maven.
- If needed, install the necessary driver for your device beforehand.
- Make sure you read the entire tutorial and follow it to the tee before rooting.
- Also do not forget to learn how to unroot your device so that your device is back to normal, in case anything goes wrong.
- Some antivirus and firewall interfere with rooting process, so it is better to disable them on your personal computer.
If you keep all the above points in mind, be sure that you will experience the best by rooting your ZTE Maven using the above method.
Other Popular Articles From Wondershare
How To Move Apps To Sd Card On Zte Maven 2
Source: https://drfone.wondershare.com/root/zte-maven-root.html
Posted by: trosclairunflithen.blogspot.com
0 Response to "How To Move Apps To Sd Card On Zte Maven 2"
Post a Comment